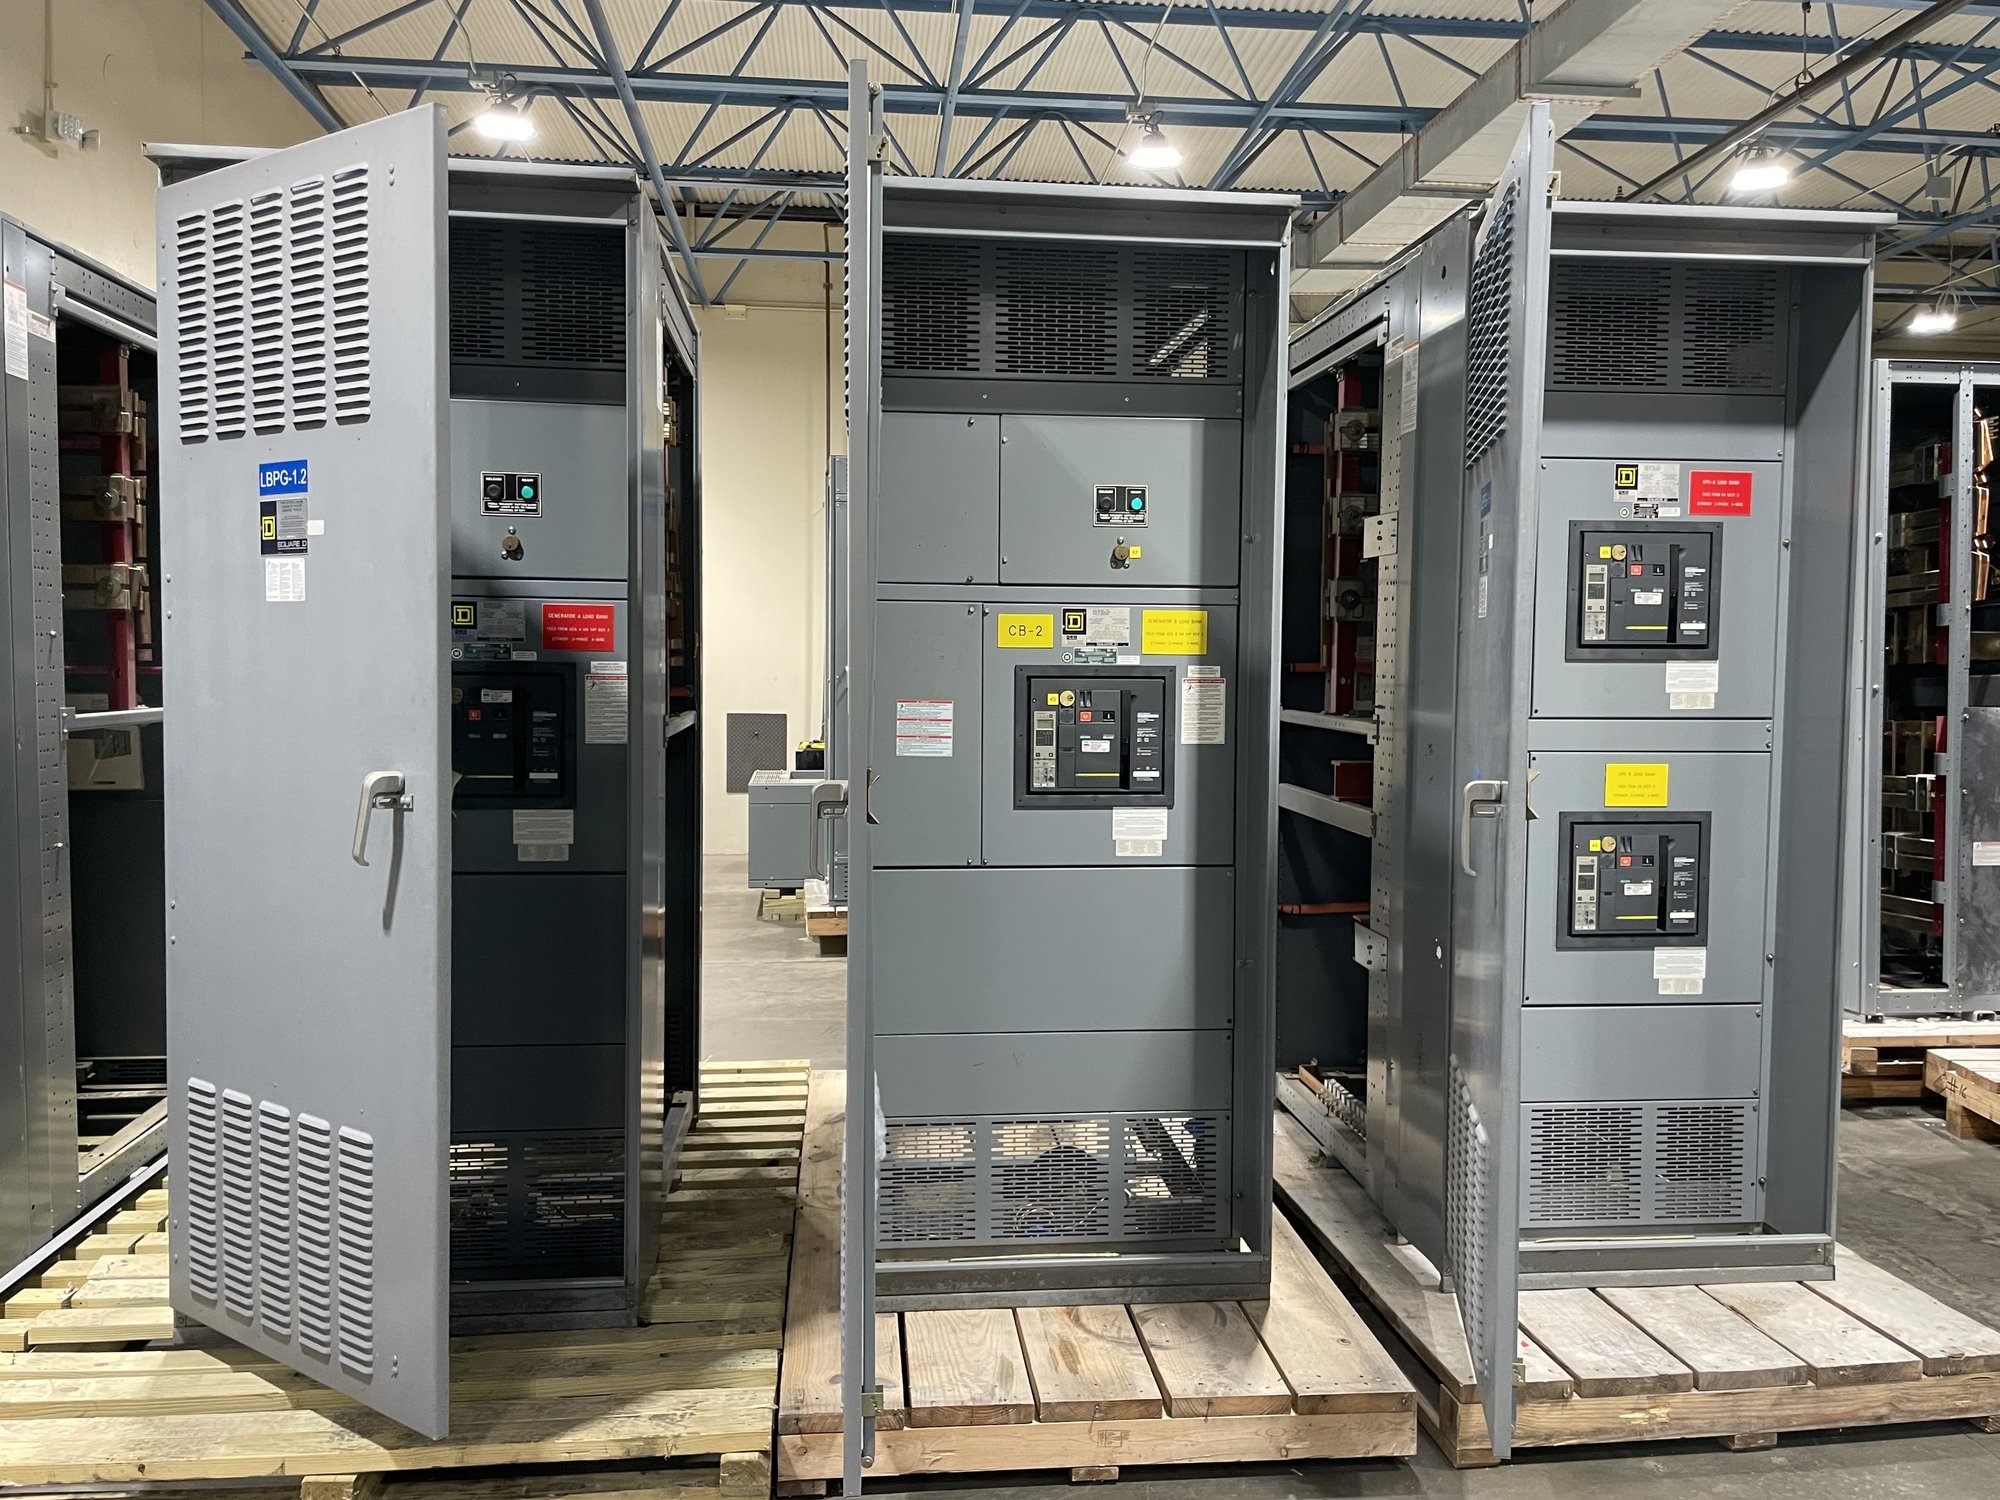
Set the inspection basis
Start with the equipment’s approved drawings, nameplates, installation instructions, project specifications, and the latest coordination and arc-flash documentation available for the installation. Confirm that the lineup and each section match the intended service, voltage, bus arrangement, feeder identification, and connection points. Record drawing revisions and any approved field changes so inspection findings are judged against the current design rather than an outdated set.
Before procurement or final release, clarify what inspection documentation and factory records will accompany the new assembly, and what must be completed at the site by the installing contractor or qualified testing provider. Share the one-line diagram, equipment schedule, available fault-current information, required protective-device functions, and project-specific inspection checklist when requesting a quote. These details help define the supplied configuration and a useful handoff without assuming the manufacturer performs site acceptance work.
Check condition before assembly
Inspect each delivered section before installation, following the project’s handling and storage instructions. Look for impact, distortion, damaged doors or hinges, cracked insulating parts, displaced barriers, corrosion, moisture, contamination, and loose or missing hardware. Check packaging and lifting points for signs of mishandling, and compare section labels and shipping splits with the approved lineup drawings. Photograph and document discrepancies before components are moved or altered.
If damage, water exposure, or contamination is found, do not treat a visual pass elsewhere as permission to energize. Identify affected parts, protect the equipment from further exposure, and obtain direction from the responsible engineer and applicable equipment documentation. The inspection record should identify the section, location, condition, and disposition of each issue. This makes it easier to distinguish a corrected shipping concern from an unresolved condition that must hold up commissioning.
Verify mechanical assembly
Review the assembled lineup for correct section order, alignment, anchorage, enclosure closure, and completion of shipping-split connections. Confirm that bus joints, supports, barriers, covers, and internal hardware are present and secured as specified. Check that doors and compartments operate as intended, interlocks function according to their design, and racking or drawout mechanisms move through their intended positions without binding. Use the manufacturer’s instructions for required checks and tools; do not improvise torque values or procedures.
Confirm that breaker and switch ratings, frame sizes, trip units, and accessory arrangements agree with approved submittals and drawings. Verify identification labels against feeder names and circuit schedules, including source and load designations where applicable. Any mismatch between installed hardware and documents should be resolved through the project’s engineering change process before energization. A corrected label alone does not resolve a difference in device rating, bus configuration, or intended circuit function.
Examine conductors and terminations
Compare incoming, outgoing, control, and grounding connections with wiring diagrams and termination schedules. Check conductor identity, phase sequence markings, routing, bend space, insulation condition, lug compatibility, and the specified preparation and connection method. Confirm that unused openings are treated as required by the equipment design and project documents, and that conductors do not interfere with barriers, moving parts, ventilation paths, or door closure.
Connection tightness must be verified using the documented procedure and specified torque for the actual terminal and conductor combination. Do not rely on appearance or apply a generic torque value. Inspect control wiring for correct landing, secure ferrules or terminals where specified, and separation or routing required by the drawings. Record completed checks, test methods, instrument details when applicable, and any exception; route discrepancies to the responsible electrical professional rather than making undocumented substitutions.
Confirm clearances and protective settings
Check working space and access against the installation drawings, equipment instructions, and applicable project requirements. Verify that walls, piping, stored materials, adjacent equipment, doors, and cable routes do not obstruct required access or the intended opening and removal of covers. Confirm that ventilation openings are unobstructed and that required barriers are in place. Clearance acceptance depends on the actual equipment, installation, and authority review; a general measurement cannot establish compliance for every arrangement.
Compare protective-device settings and installed trip-unit functions with the approved coordination and arc-flash studies, equipment schedule, and latest settings record. Verify device identity, sensor or rating plug where applicable, pickup and delay values, ground-fault functions, and other specified options. Settings must be established and verified by qualified personnel under the project’s procedures. If the study, device, or setting record conflicts, stop and obtain engineering resolution; do not energize based on an assumed default or a setting copied from another lineup.
Close findings and hand off
Before release, gather inspection forms, photographs, corrected drawing references, device-setting records, test reports required by the project, and a list of outstanding exceptions. Assign each open item to a responsible party with a documented disposition. Confirm that covers and barriers are restored, temporary materials are removed, and the area is ready for the next authorized commissioning step. Energization remains subject to the project’s approved procedures, qualified personnel, engineering review, and applicable authority requirements.
For a Georgia project, share the installation location, requested delivery window, site receiving constraints, lineup shipping arrangement, and inspection-document expectations when planning a new custom-built assembly. Confirm the scope, availability, and timeline for each order; delivery planning should support the site’s receiving and installation sequence, not replace its readiness review. Before requesting a quote, provide the current drawings, device schedule, study status, and any known site constraints, then use the agreed submittals to prepare a documented inspection and handoff plan.